

OLYMPUS OMD EM-5 test i wrażenia / sample photo /

OMD - Miło mieć w ręku aparat z wygrawerowanymi inicjałami fotografa OMD to skrót od Opowiada Marcin Dobas
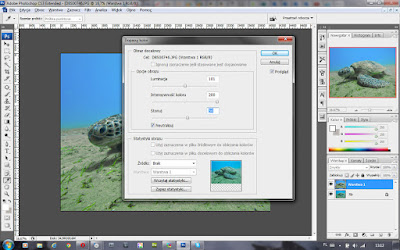
Jak wywołać podwodne zdjęcie i usunąć niechciany zafarb.
Poniżej przedstawiam króciutki tutorial - jak wywołać podwodne zdjęcie a dokładnie jak usunąć niechciany zafarb.


"Doczytałeś" tutaj ? zapraszam na facebooka
Nieodpowiednie oświetlenie i
nieodpowiednie ustawienie balansu bieli w cyfrowym aparacie skutkuje
tym, że fotografia ma dziwne kolory zupełnie nie przypominające
tego co chcieliśmy sfotografować. Fotografując na powierzchni,
raczej posiadamy już umiejętność odpowiedniego ustawienia balansu
bieli. Jeśli wartość temperatury barwowej jest dla nas czymś
całkowicie niezrozumiałym to poprawne ustawienie balansu bieli
ułatwiają nam ikonki występujące w menu aparatu. Słonko,
chmurka, cień, żarówka... Nawet dziecko jest w stanie sobie
poradzić intuicyjnie z obsługą takiego menu.
Rzecz przedstawia się zupełnie
inaczej gdy zejdziemy pod wodę... Tam już jest dużo trudniej. Nie
wystarczają intuicyjne ikonki. Światło aby oświetlić obiekt,
musi przebrnąć przez słup wody który na każdym centymetrze
pochłania je w sposób selektywny. Szybciej niż granatowy znika
czerwony, a to powoduje, że nasze zdjęcie będzie miało
nieprzyjemny zafarb.
Jest wiele sposobów radzenia sobie z
tym problemem w terenie. Jednym z najprostszych jest stosowanie lampy
błyskowej, której światło musi przebyć niezbyt długa drogę.
Jednak co zrobić gdy mamy fajne ujęcie, ale tragiczne kolory.
Możemy próbować uratować taką fotografię na etapie
postprocessingu.

Podczas wykonywania tej fotografii moja
lampa błyskowa uległa awarii. Nie byłem w stanie doświetlać
żółwia lampą i bazowałem na zastanym oświetleniu.
Jednym z prostych, skutecznych i często
przeze mnie stosowanych zabiegów jest wykorzystanie funkcji MATCH
COLOR ( dopasuj kolor) dostępnej w programie ADOBE Photoshop. W
dużej części podwodnych zdjęć można to polecenie wykorzystać
do usunięcia niepożądanego zafarbu.
Dobrym nawykiem podczas edycji zdjęć, jest taki sposób pracy, który umożliwia powrót do poprzedniego stanu – gdy po godzinach edycji stwierdzimy, ze idziemy w zupełnie nie prawidłowym kierunku :)
Dobrym nawykiem podczas edycji zdjęć, jest taki sposób pracy, który umożliwia powrót do poprzedniego stanu – gdy po godzinach edycji stwierdzimy, ze idziemy w zupełnie nie prawidłowym kierunku :)

Otwieramy zdjęcie – które będziemy
edytowali.
Zacznijmy więc od duplikowania warstwy
TŁO ( która będziemy edytować )
czyli od naciśnięcia skrótu klawiaturowego CTRL + J lub Command + J jeśli pracujesz na MACu. W tym momencie powieliliśmy naszą warstwę ( która znajduje się nad warstwa TŁO) i od tej chwili wszystkie zmiany będą dotyczyły nowo utworzonej warstwy.
czyli od naciśnięcia skrótu klawiaturowego CTRL + J lub Command + J jeśli pracujesz na MACu. W tym momencie powieliliśmy naszą warstwę ( która znajduje się nad warstwa TŁO) i od tej chwili wszystkie zmiany będą dotyczyły nowo utworzonej warstwy.
Następnym krokiem jest wybranie z menu
Image > Adjustments >Color Match
( Obraz > Dopasowania > Dopasuj
kolor )


Gdy wyskoczy nam odpowiednie okno –
Zaznaczamy pole wyboru NEUTRALIZUJ i za pomocą suwaka STONUJ
jesteśmy w stanie zapanować nad tym w jakim mocnym stopniu
dominanta będzie wygaszana. Jestem zwolennikiem utrzymywania tego
suwaka gdzieś w okolicach połowy skali ( choć to zawsze zależy od
tego jak wygląda nasze zdjęcie )
Dodatkowe suwaki to INTENSYWNOŚĆ KOLORU oraz LUMINACJA. Zachęcam do eksperymentowania położeń suwaka i znalezienia odpowiednich ustawień dla siebie.
Po usunięciu dominanty – reszta obróbki to dopasowanie poziomów ( CTRL + L ) oraz wyostrzenie zdjęcia
FILTR > WYOSTRZANIE > MASKA WYOSTRZAJĄCA
Dodatkowe suwaki to INTENSYWNOŚĆ KOLORU oraz LUMINACJA. Zachęcam do eksperymentowania położeń suwaka i znalezienia odpowiednich ustawień dla siebie.
Po usunięciu dominanty – reszta obróbki to dopasowanie poziomów ( CTRL + L ) oraz wyostrzenie zdjęcia
FILTR > WYOSTRZANIE > MASKA WYOSTRZAJĄCA


Po zestawieniu dwóch fotografii wyraźnie widać, że pierwotna wersja była bardzo mocno zaniebieszczona a po tym krótkim zabiegu udało nam się usunąc niepożądany efekt.


"Doczytałeś" tutaj ? zapraszam na facebooka
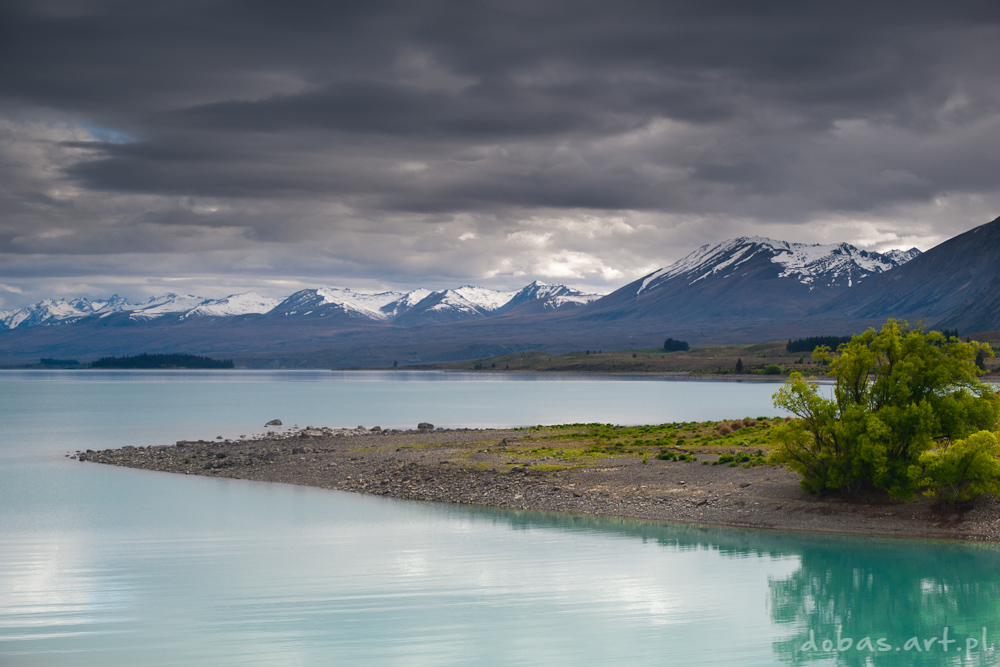
Kolorowe jeziorka
Wyjątkowo nie będzie o kolorowych jeziorkach leżących nieopodal Wieściszowic. Jako, że kolejny wyjazd do Nowej Zelandii dobiegł końca - pora na prace kameralne z Lightroomem i pic2exe. Celem jest skończenie pokazu i artykułu...


"Doczytałeś" tutaj ? zapraszam na facebooka
"Doczytałeś" tutaj ? zapraszam na facebooka
To the Arctic - filmowa podróż do Arktyki
Już wkrótce bo w kwietniu 2012 roku w kinach ukaże się nowa produkcja poświęcona Arktyce
IMAX Corporation - jest producentem filmu W roli narratorki usłyszymy Meryl Streep, podwójną zdobywczynię Oskara za rolę w „Sophie’s Choice” i „Kramer vs. Kramer”. Produkcja ukaże się 20 kwietnia 2012 roku wyłącznie w kinach 3D IMAX ®.

Jesli macie ochotę osobiście wybrać się ze mną do Arktyki - wkrótce napiszę w jaki sposób się do tego zabrać :) "Doczytałeś" tutaj ? zapraszam na facebooka
IMAX Corporation - jest producentem filmu W roli narratorki usłyszymy Meryl Streep, podwójną zdobywczynię Oskara za rolę w „Sophie’s Choice” i „Kramer vs. Kramer”. Produkcja ukaże się 20 kwietnia 2012 roku wyłącznie w kinach 3D IMAX ®.
Twórcy filmu „To The Arctic 3D” pokaża nam piękna, zimna i niedostepną Arktykę. Bohaterem opowieści będzie niedźwiedzica polarna, opiekująca się swoimi młodymi.
Niezwykła historia o przetrwaniu, heroicznej walce i wielkiej więzi między matką i jej potomstwem.
Zwiastun filmu „To The Arctic 3D”
Niezwykła historia o przetrwaniu, heroicznej walce i wielkiej więzi między matką i jej potomstwem.
Zwiastun filmu „To The Arctic 3D”
Jesli macie ochotę osobiście wybrać się ze mną do Arktyki - wkrótce napiszę w jaki sposób się do tego zabrać :) "Doczytałeś" tutaj ? zapraszam na facebooka
Sirui T-025 – My Impression after Tests in the Himalayas
W związku z bardzo duzym zainteresowaniem opisami obiektywu i statywu oraz pytaniami po angielsku jakie dostałem na jego temat ponizej zamieszczam tłumaczenie :
Sirui T-025 with C-10 Ball Head
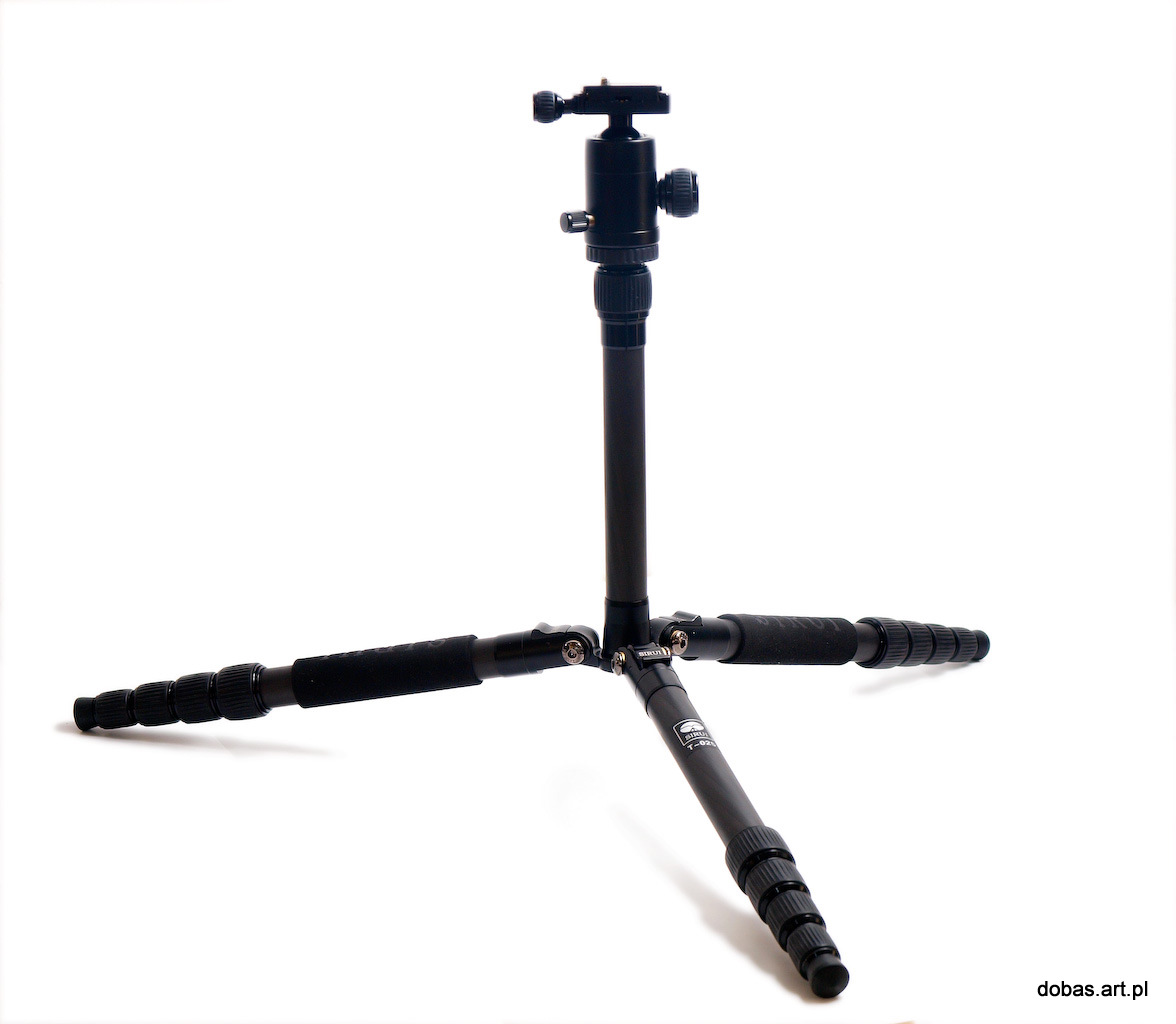
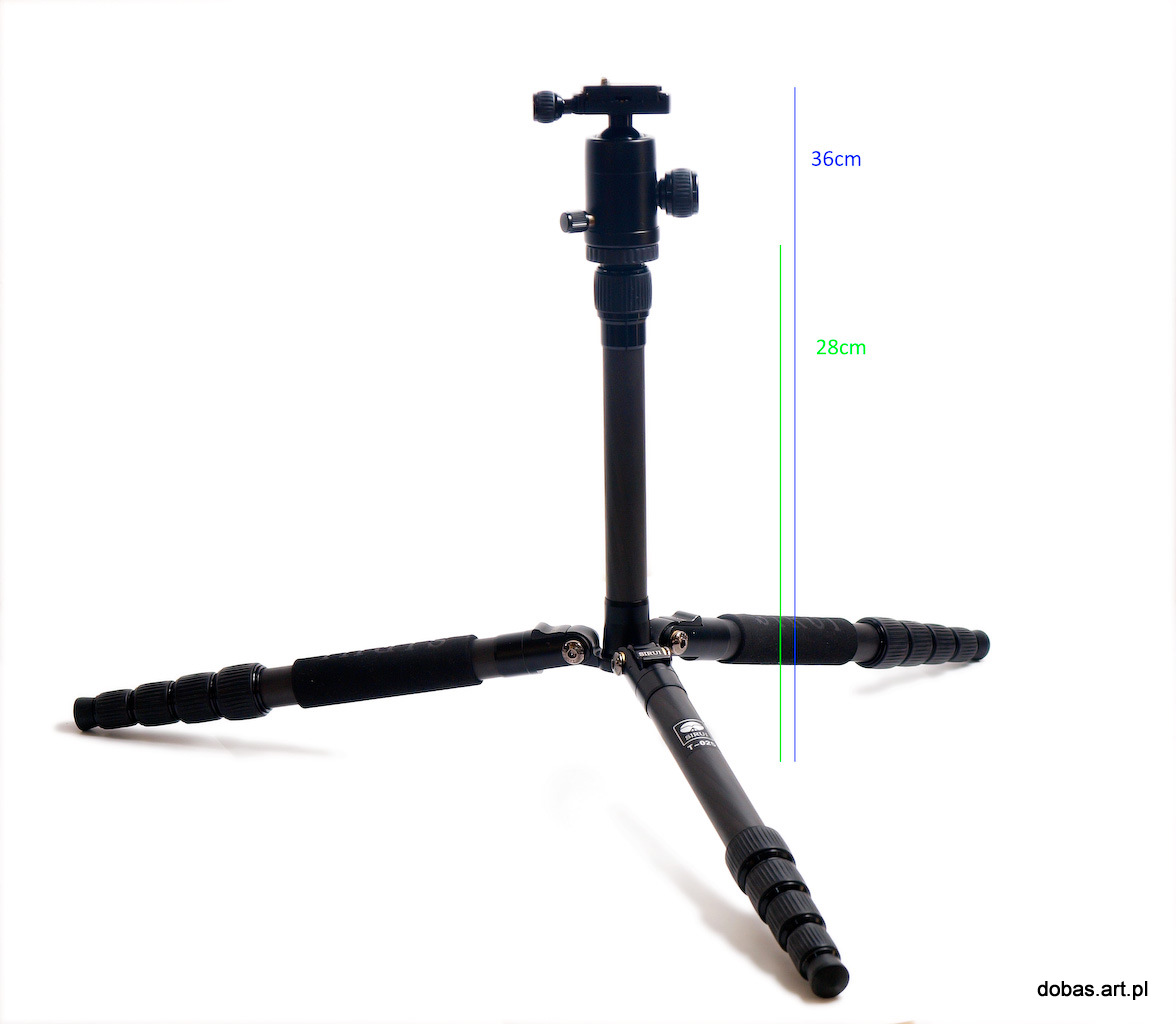
Always, when I look at such type of picture the tripod seems awkward, very high and the central column looks extremely extended. It is however a false impression. Below, the same photo with the lengths given:
It is not high, not unstable, and certainly not awkward.
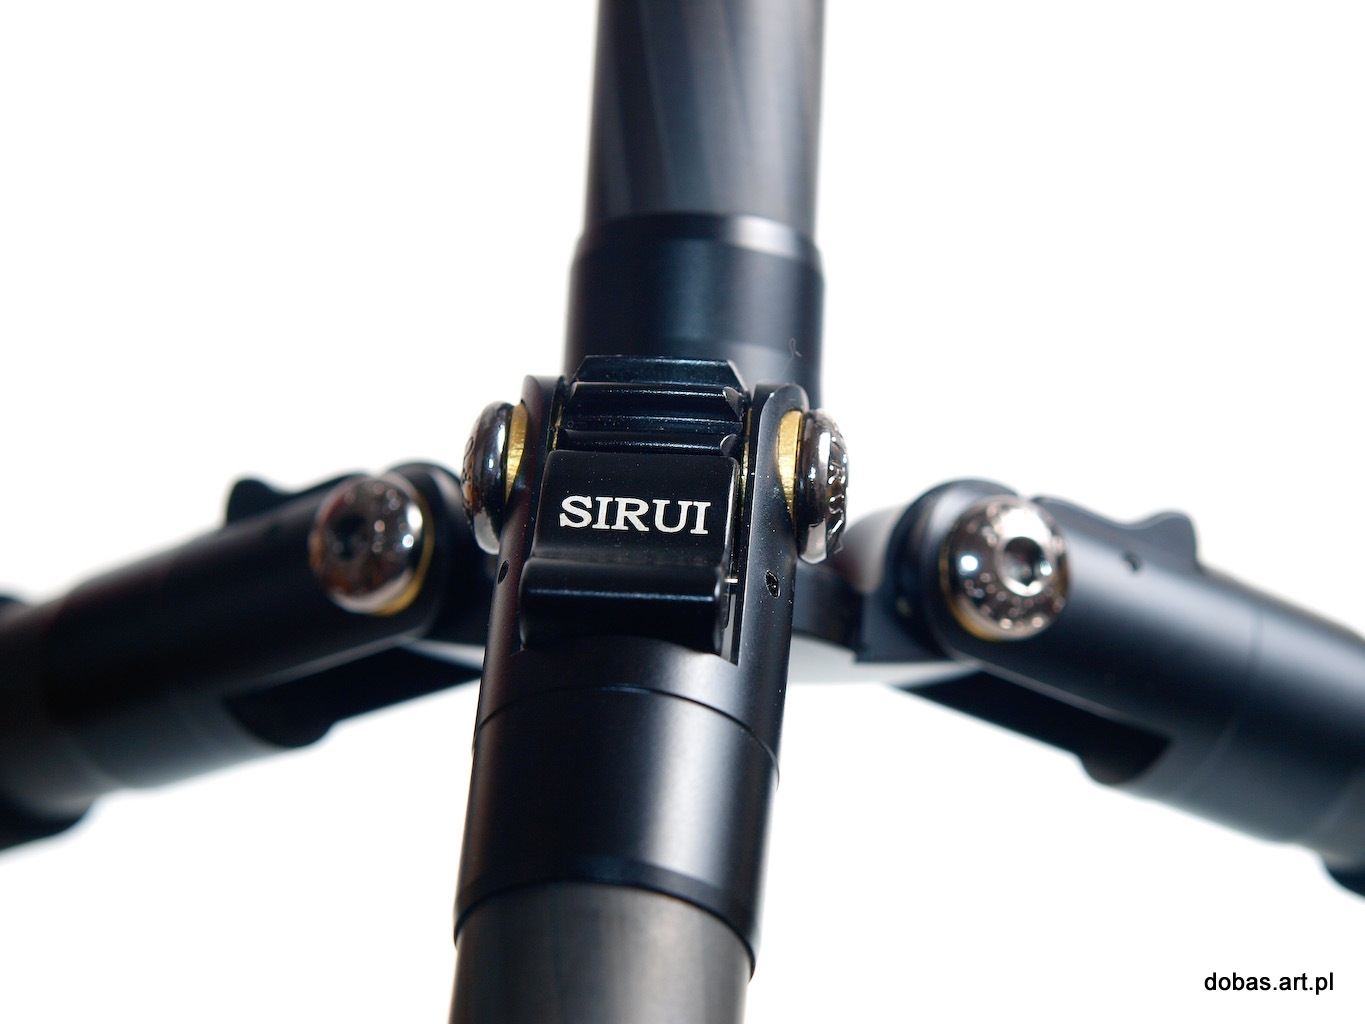
Thanks to the blocking system on the hinges of the tripod legs, the legs may be set at different angles – starting from very wide, through intermediate positions, to a very sharp angle, as shown below. The blocking system of the tripod legs is very simple and solid. I really like such solutions – the simpler the better, as less can go wrong with it. The blocking system is reliable and strong.
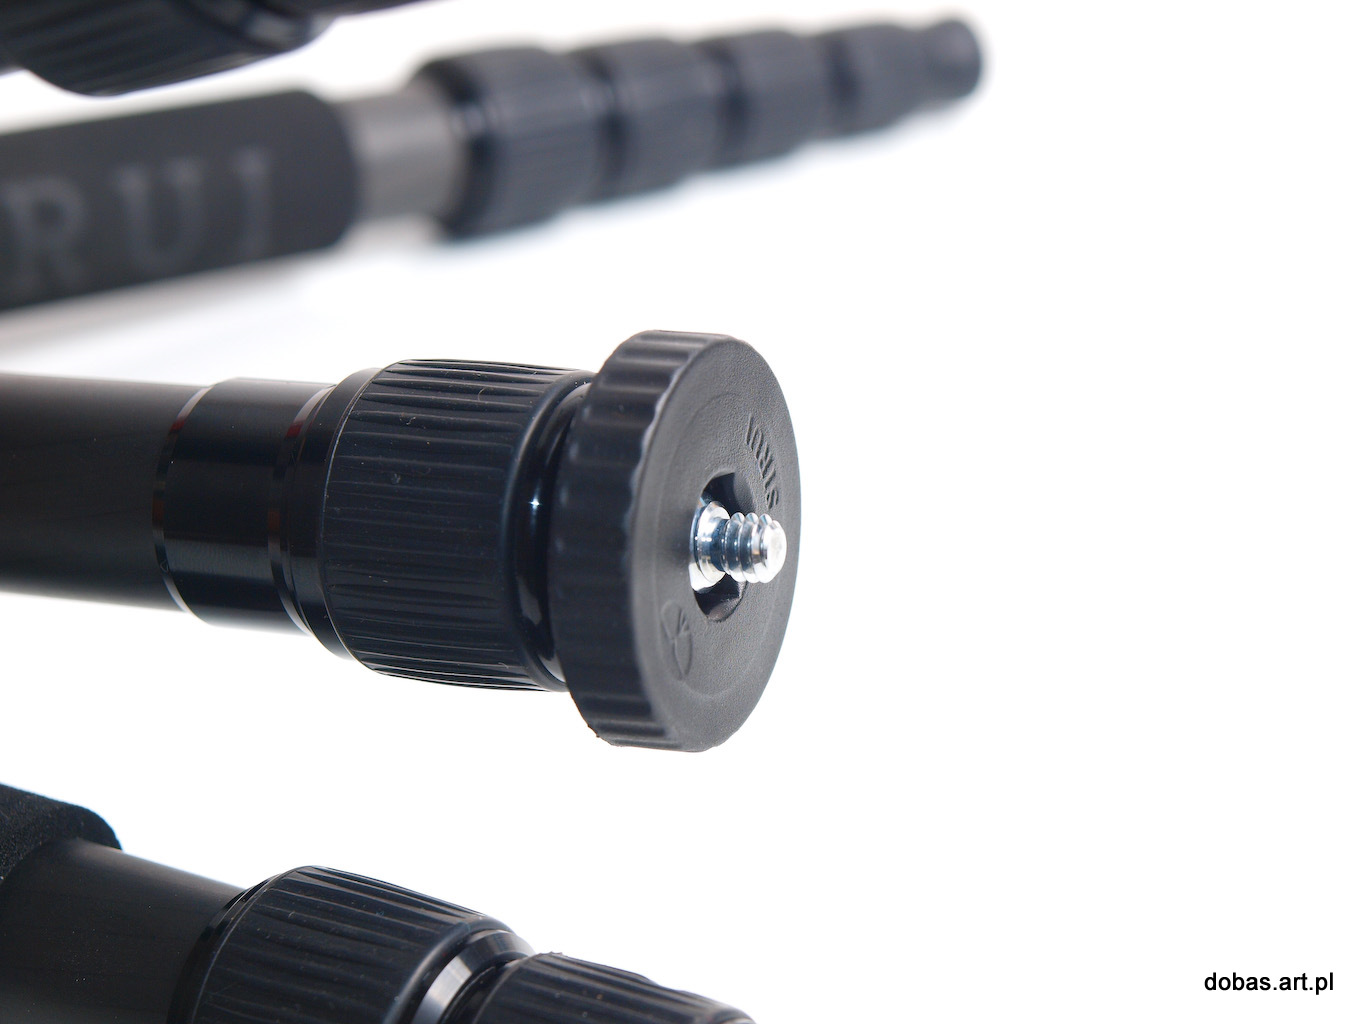
COLUMN AND HEAD

The column ends with a round ‘plate’ made of plastic, and a 3/8 inch stainless steel thread. It is a standard size used in photography, in particular in spots where a head is fixed to the tripod legs. Another standard is 1/4 inch, and this thread is used in such places as camera body. Thus, normally fixing a camera directly to a tripod is not possible (thread bigger than 3/8 inch). Here, the SIRUI tripod comes as another surprise. The thread may be easily changed from the bigger one to the smaller one, as the manufacturer equipped the tripod with a double thread, making the tripod very flexible. A change from 3/8 to 1/4 takes only seconds:

Still reading? Join in more discussion on facebook
Tripod is an
inseparable element of photography. It brings an added value and
gives more options of taking photos. It allows the use of long or
even very long exposure – impossible to do without a tripod. Other
techniques that may be applied include HDR or multiple exposure where
several shots are put together and often you need exactly same frames
with different parameters of exposure. Tripod allows the use of
longer focal length, where without a support of a tripod you have no
chance of taking photos that are not blurred. Tripod ensures better
stability.
Also, you
can use a tripod for panoramic photos, to make time lapses, etc. Even
with short exposure seemingly possible to do with no support after
comparing such photos with photos taken in identical conditions, but
with the use of a tripod, the latter will turn out to be of much
better quality.
Every tripod
has, however, some downsides, namely its weight, size and the fact
that you have to carry it around.
The old rule
says that the heavier the tripod the better for photography, but not
so good for carrying. You hit the nail on the head when you find a
golden mean or….
Or you can
use advanced technologies applied for many years in Formula 1 or
aviation. Namely, you can get a carbon fibre tripod.
When I
gathered equipment for my last trip to the Himalayas, the main
requirement was lightweight and stable tripod.
My choice was
My choice was
Sirui T-025 with C-10 Ball Head
made available to me
through the courtesy of Delta (FotoTip).
It is compact,
lightweight, with the head weighing 800 gram (!!!!) while my usual
choice, Manfrotto, weighs with the head is more than 4 kg. Because I
had with me the whole 4/3 micro system, carrying around a 4-kilo
tripod would be rather much.
On the other hand,
800-gram tripod is almost unnoticeable. It weighs less than my Zuiko
50-200 lens which is in my bag basically all the time.
After a month with this
tripod, I can say that I love it.
It is really
solid. Extremely light as already mentioned. Its legs may be spread
really wide, so the central column starts just above the ground – a
great solution, as stability of the tripod is then amazing.
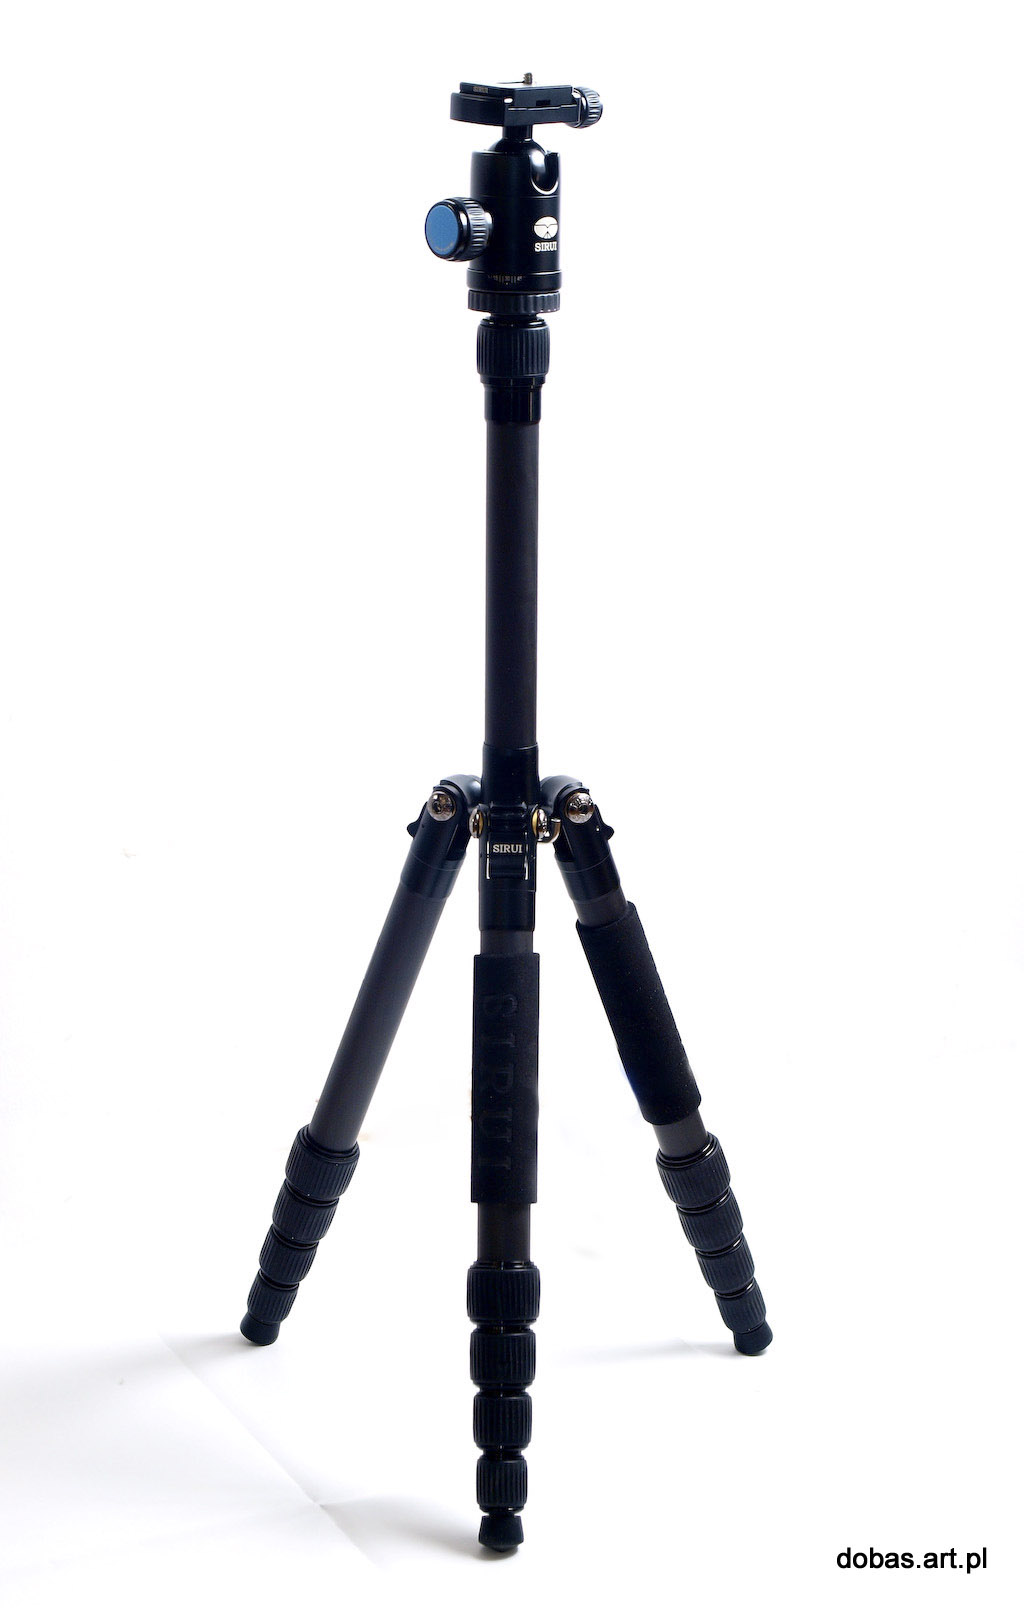
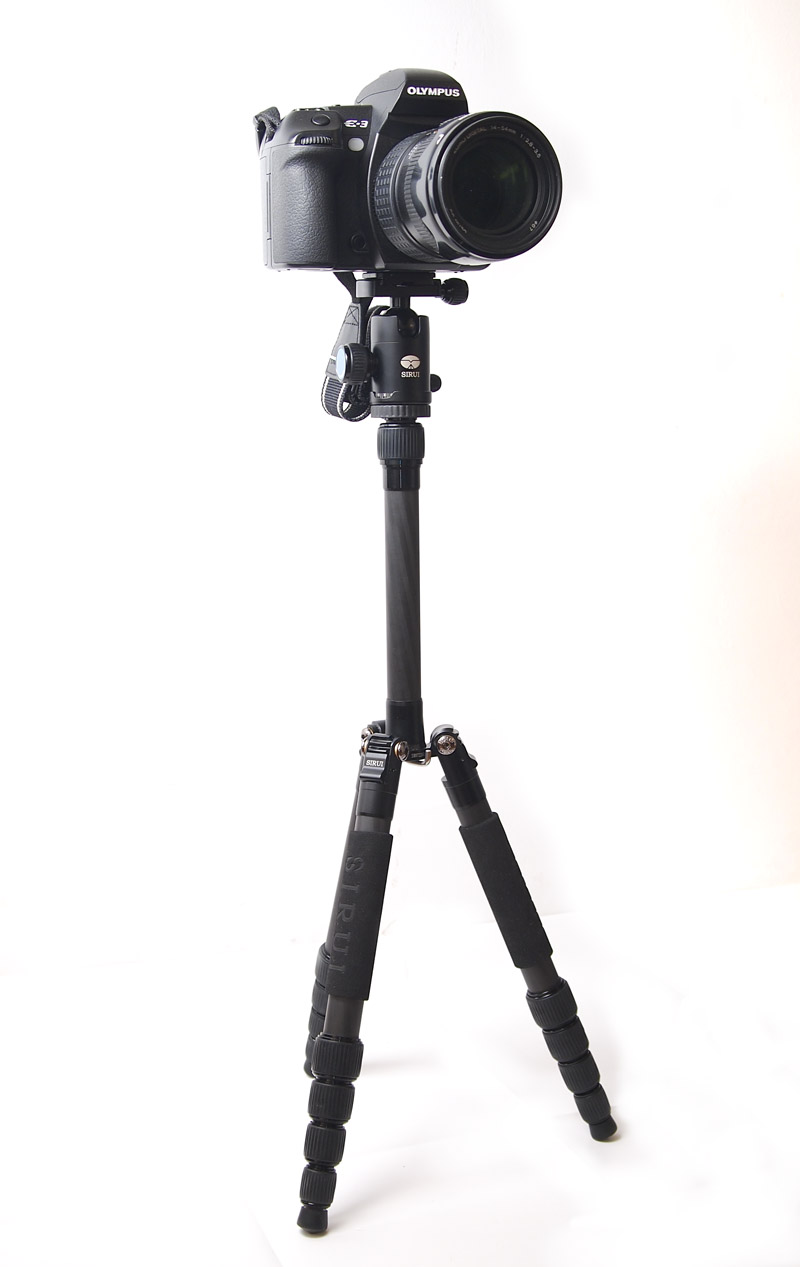
When the legs are spread
at the maximum angle, it looks like this:
Always, when I look at such type of picture the tripod seems awkward, very high and the central column looks extremely extended. It is however a false impression. Below, the same photo with the lengths given:
As you can see,
from the place where the head is fixed the distance to the ground is
28 cm, and to the camera fastening, about 36 cm.
It is not high, not unstable, and certainly not awkward.
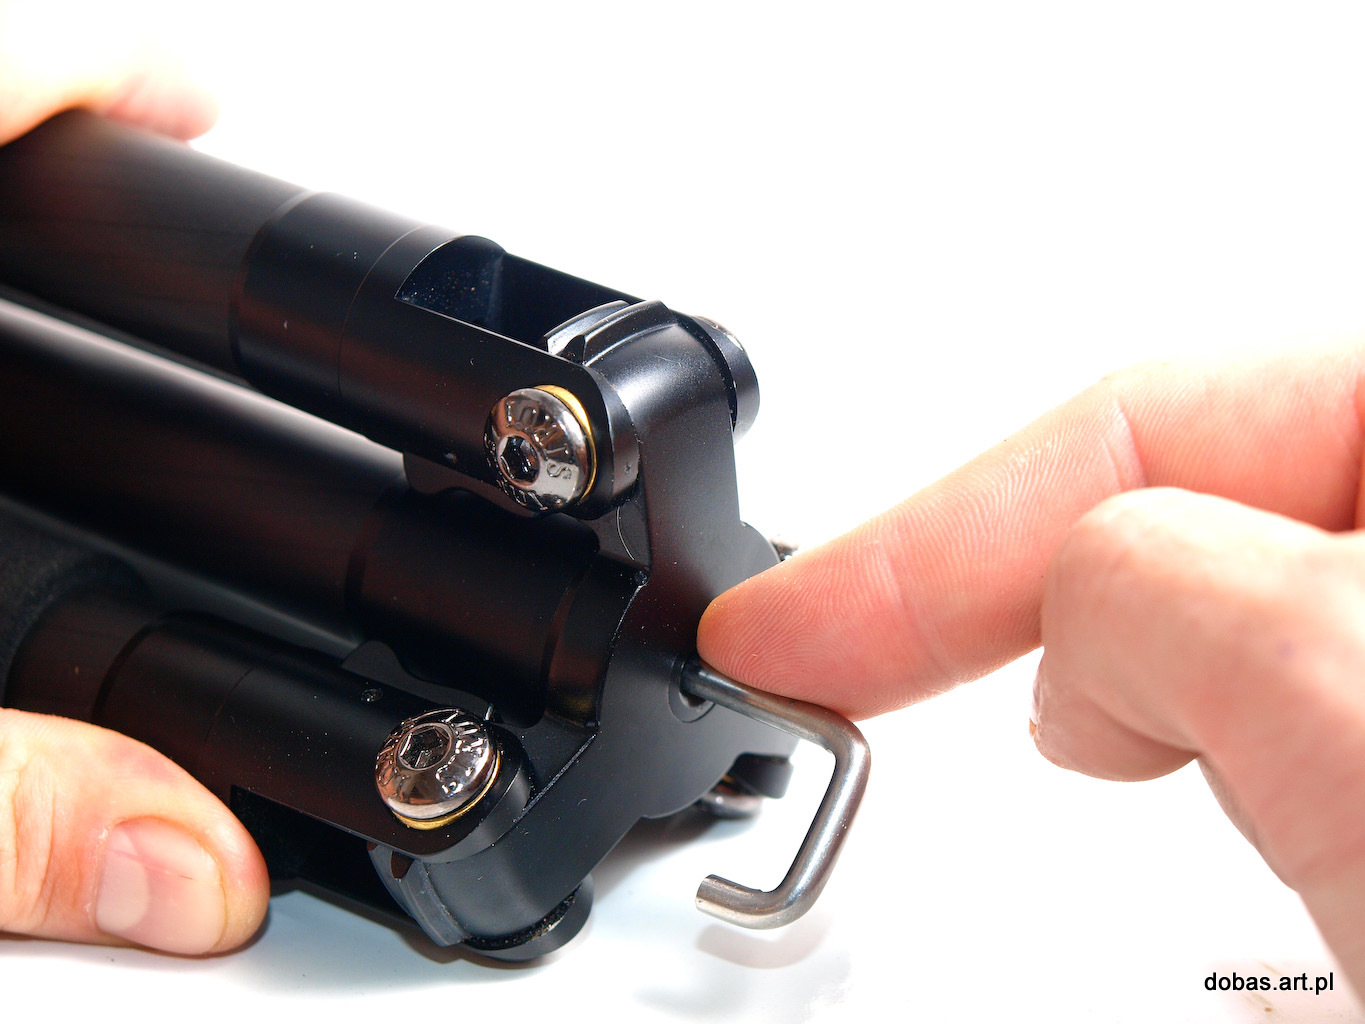
Thanks to the blocking system on the hinges of the tripod legs, the legs may be set at different angles – starting from very wide, through intermediate positions, to a very sharp angle, as shown below. The blocking system of the tripod legs is very simple and solid. I really like such solutions – the simpler the better, as less can go wrong with it. The blocking system is reliable and strong.
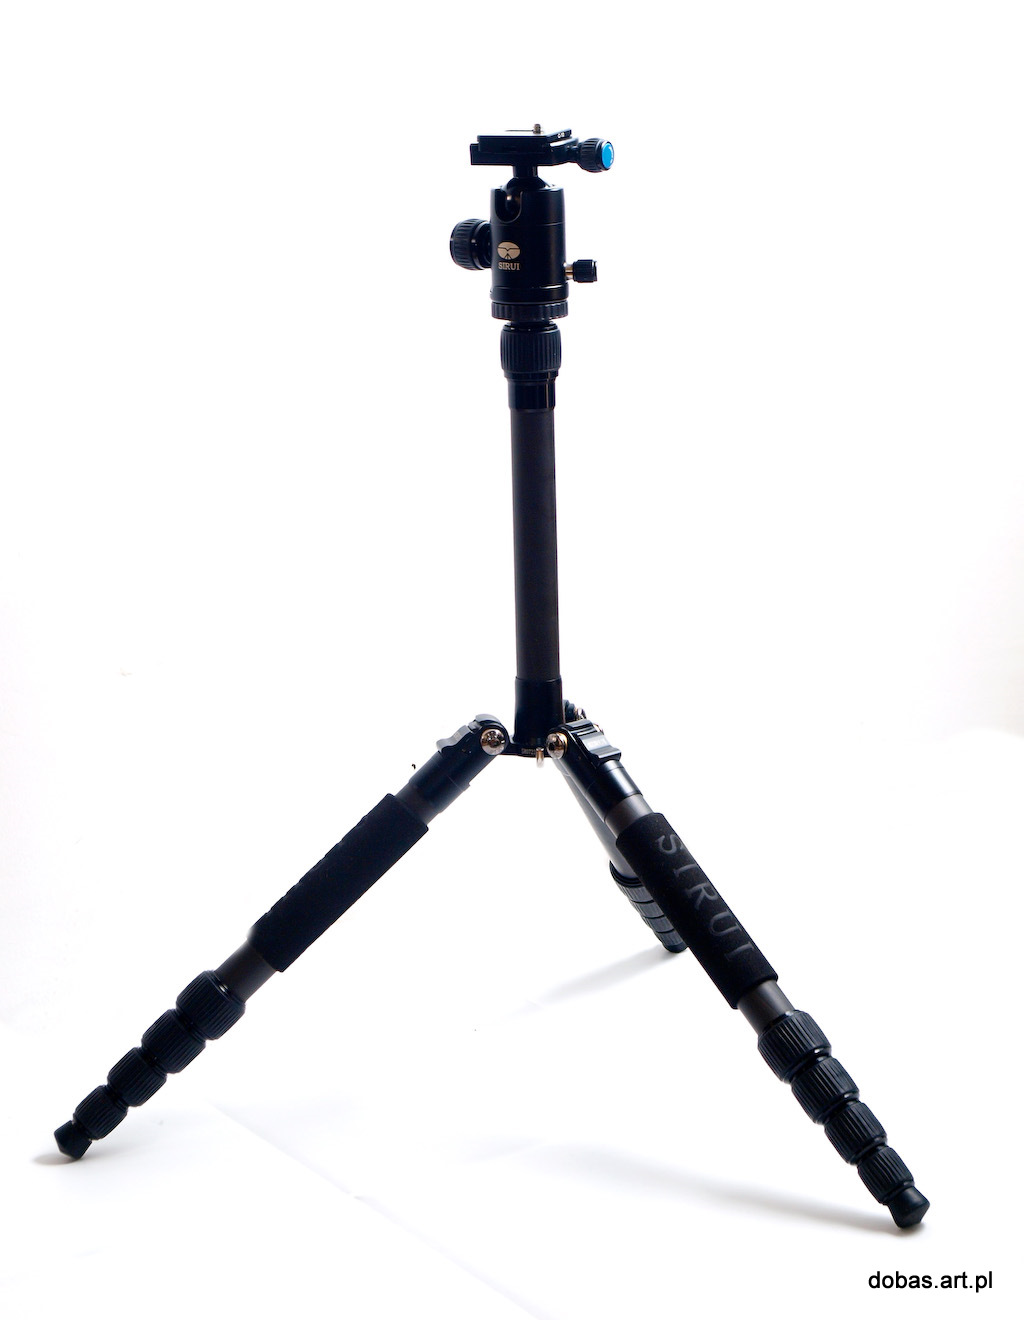
The legs may be set as
shown below:
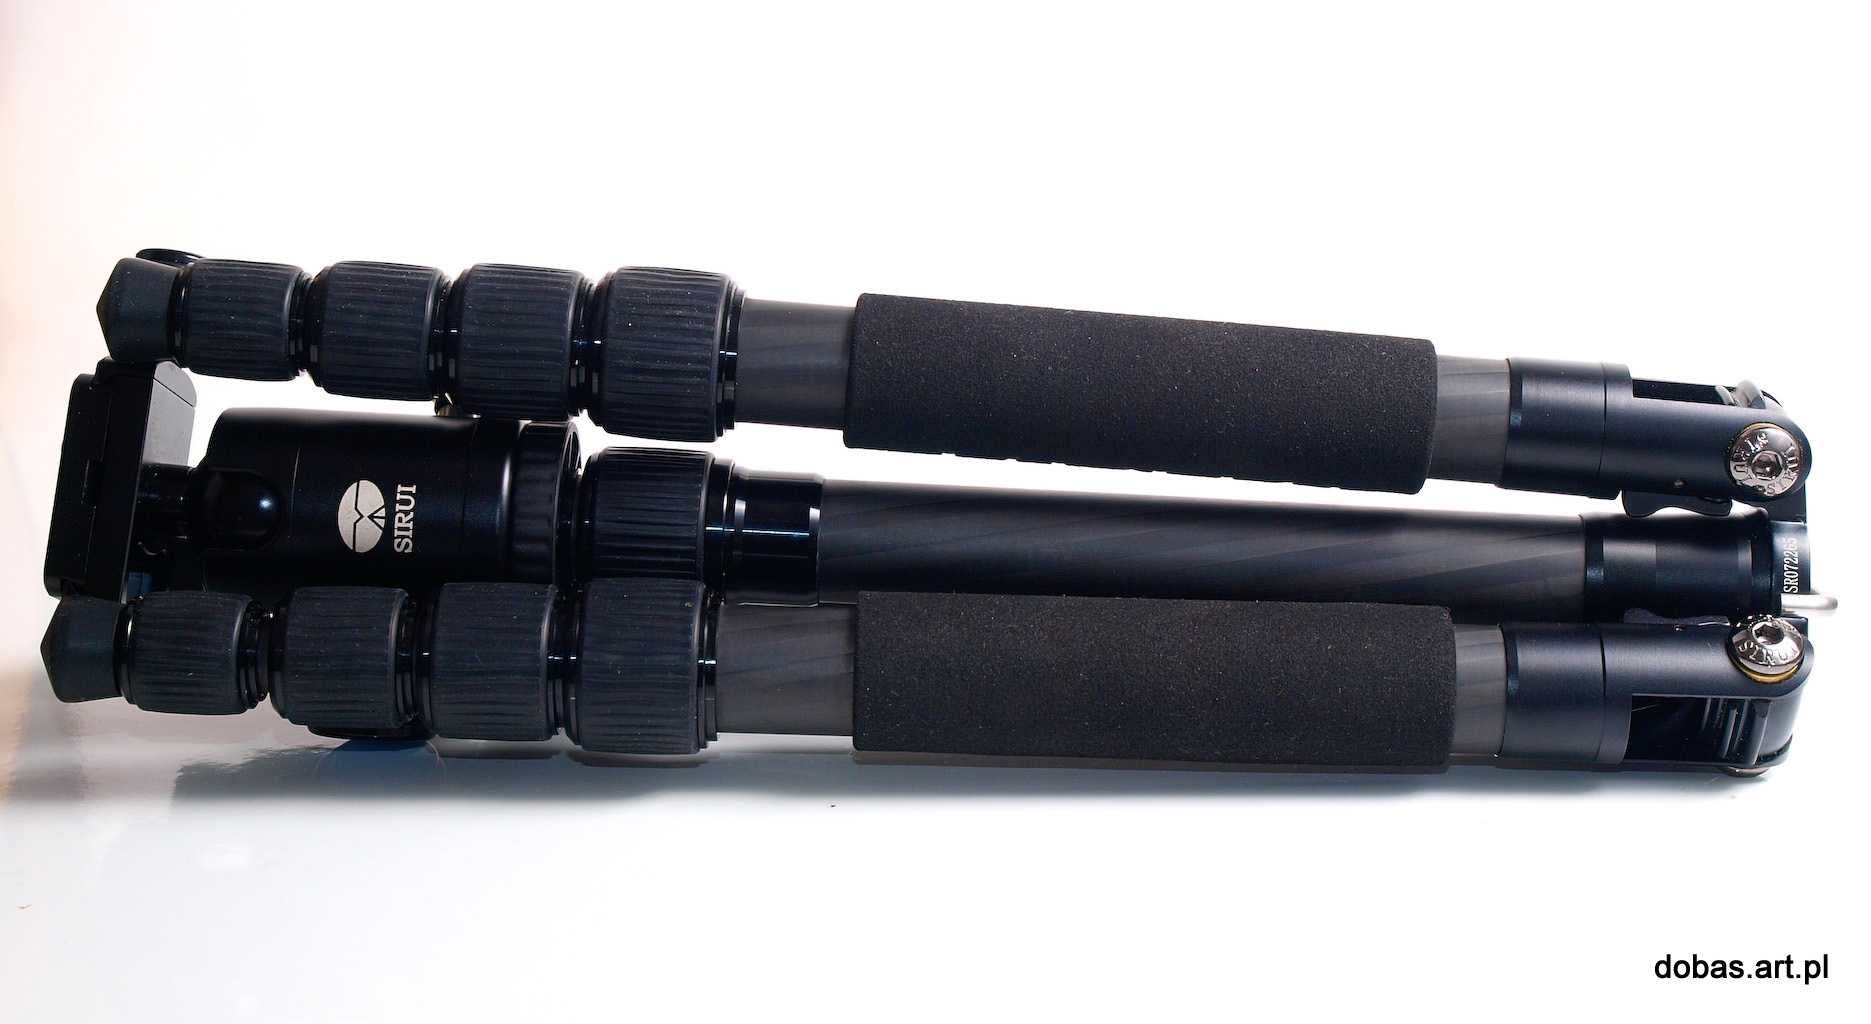
The way the
tripod is folded is also an excellent solution. The tripod legs turn
by 180 degrees, so when they are folded they are parallel to the
central column. Such solution makes this tripod extremely small after
folding. It is so little that it can be easily carried attached to a
belt and it does not restrain your movements. In its folded form,
this tripod is extremely small and lightweight, its length is about
30 cm, and after unfolding it becomes a proper tripod:
I’ve heard
some criticism of such method of folding a tripod, and I was
sceptical for a while, but after using it for a short time I think it
is a really good, innovative solution. The fact that this tripod uses
different techniques from what we might be used to should be seen as
a virtue, not a fault. It is an innovation enabling folding a piece
of equipment from 140 cm to a package about 30 cm in length.
As to the
dimensions significant for the owner of the tripod, it looks as
follows:
length of
the column is adjustable from 20 to 40 cm
legs are
adjustable from 30 to 100 cm
The whole
tripod with minimum leg extension and maximally wide angle has 28 cm
from the ground to the end of the tripod, and 36 cm including the
head.
Maximally
extended legs and acute angle gives you 128 cm without the head, and
137 cm with the head. It was certainly sufficient for all my needs.
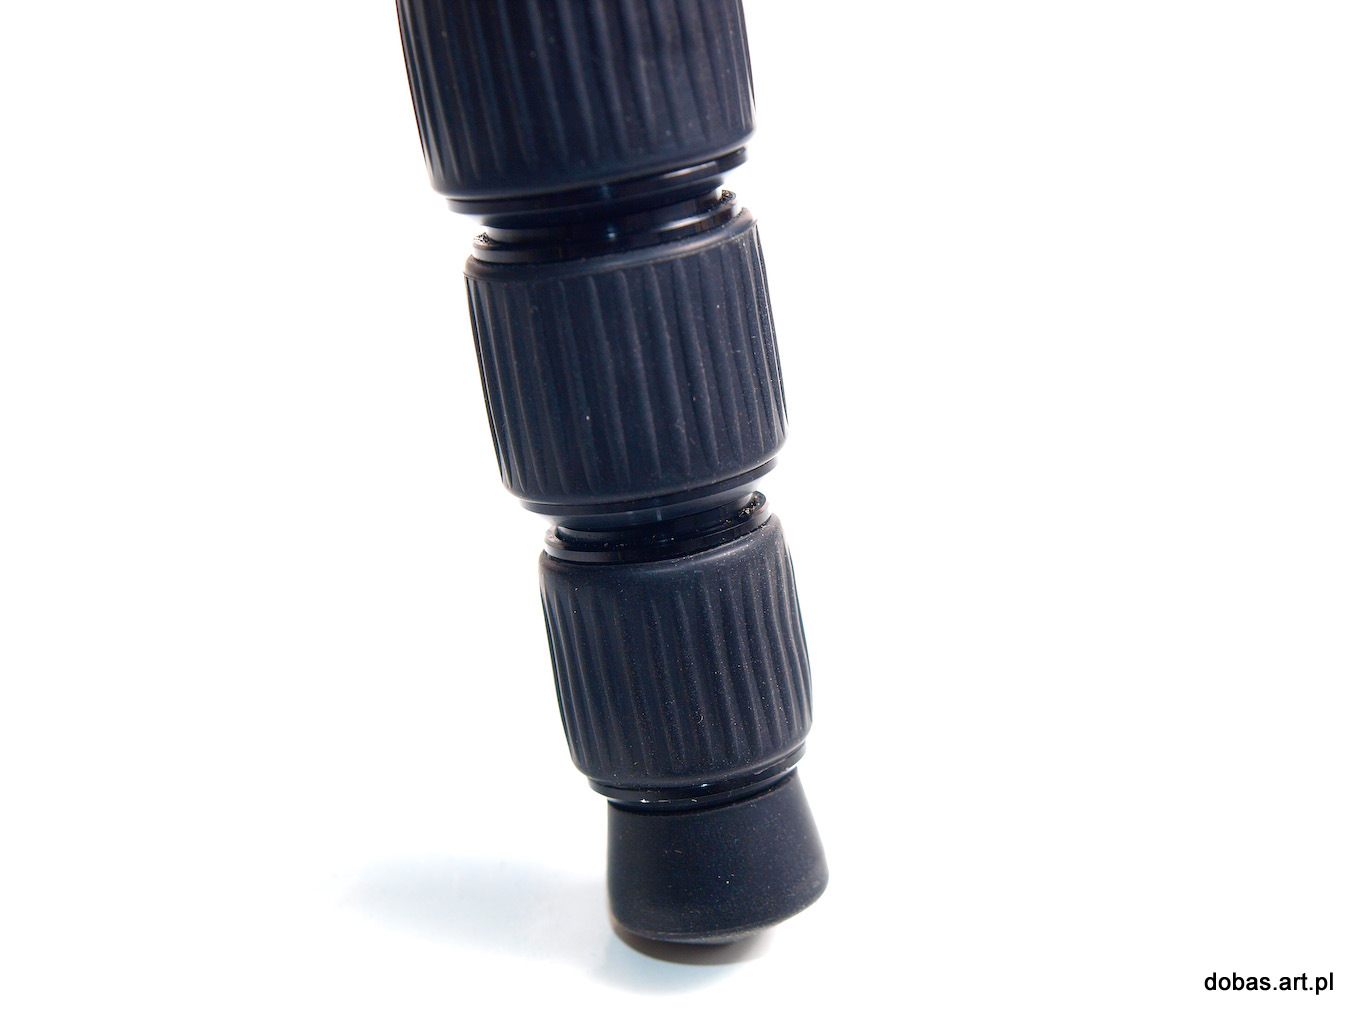
Blocking the
legs with knobs is also a good solution. They are easy to use, nice
to touch and solid rubber knobs. Loosening them allows you to extend
the legs or the central column, and tightening blocks the elements.
Additionally,
under the tripod there is a hook on a spring. A very useful feature
as you can always hang something heavy (a rucksack) and add ballast
to the tripod – it can come in handy in strong wind conditions, I
used it several times when the wind was picking up.
Using the
tripod in very low temperature is also quite pleasant. Touching
elements made of carbon fibre is not as bad as touching metal. Apart
from that, the legs have foam pads, so even at night with really low
temperatures I was able to use the tripod without gloves. This would
be unthinkable with fully metal tripod, when your hands go numb after
a short while, and if your hands are slightly damp they might even
freeze to the metal. With this tripod, you’ll have no such problem.
COLUMN AND HEAD
Now a few
words about the column and the head
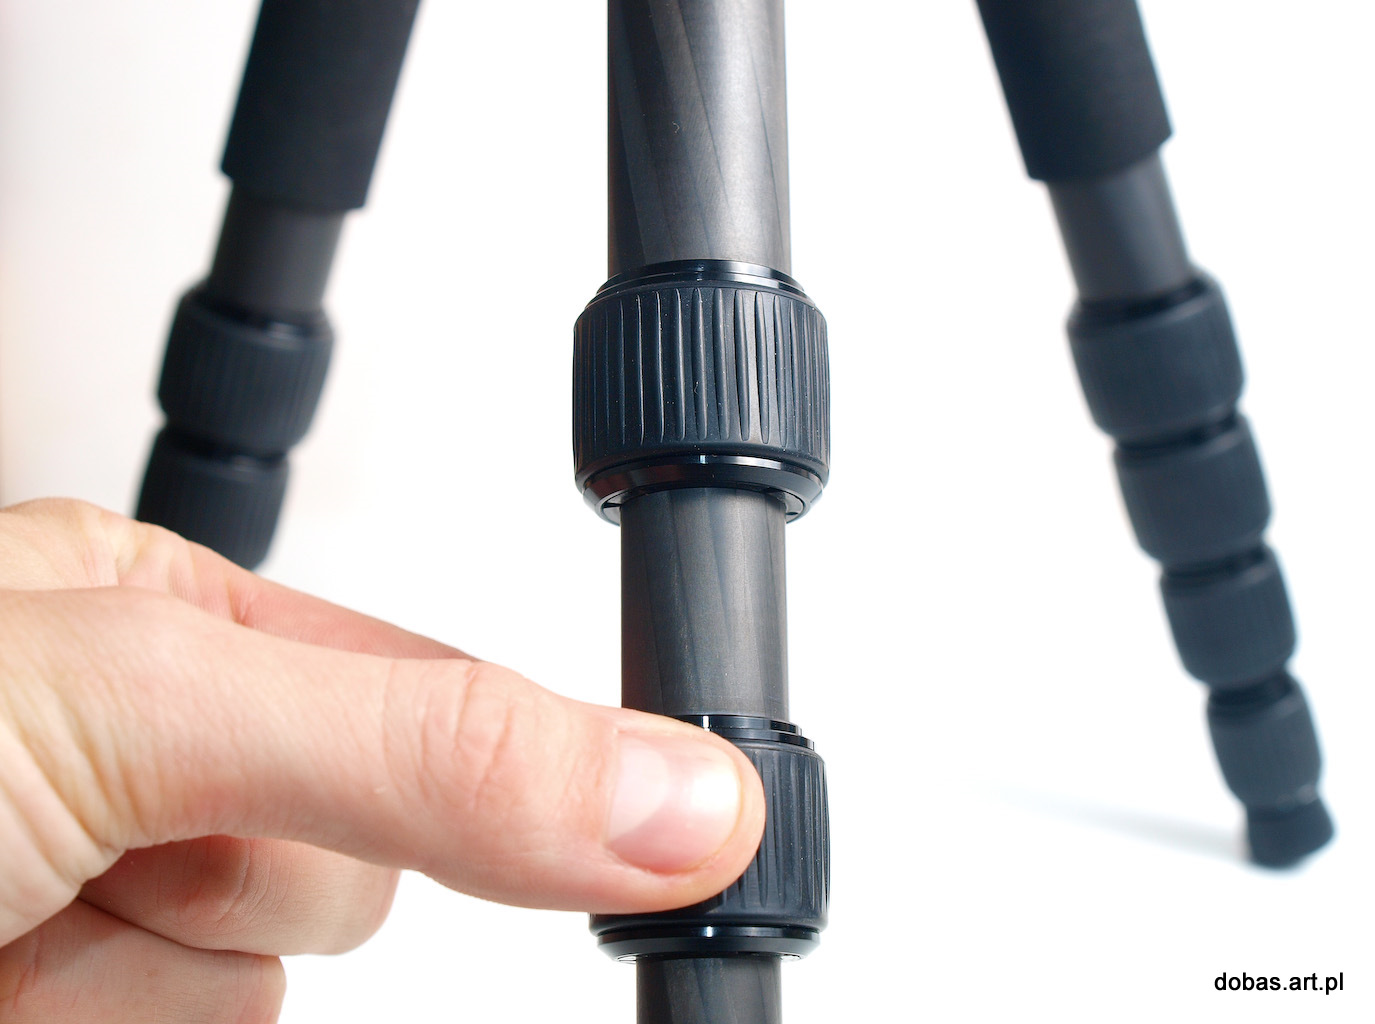
Extending
and blocking the column is solved in the same way as with the legs.
As I said before, it is an easy, reliable solution, and the knob does
not look like cheap plastic, but really solid element. I am convinced
of it after a month of very intense use of this equipment day after
day, during trekking in the Himalayas, quite demanding trip in rather
unfavourable conditions for the equipment (temperatures ranging from
+3- to -10°C,
rain, dust, etc.), I had no problems in using this solution.
The column ends with a round ‘plate’ made of plastic, and a 3/8 inch stainless steel thread. It is a standard size used in photography, in particular in spots where a head is fixed to the tripod legs. Another standard is 1/4 inch, and this thread is used in such places as camera body. Thus, normally fixing a camera directly to a tripod is not possible (thread bigger than 3/8 inch). Here, the SIRUI tripod comes as another surprise. The thread may be easily changed from the bigger one to the smaller one, as the manufacturer equipped the tripod with a double thread, making the tripod very flexible. A change from 3/8 to 1/4 takes only seconds:
First you loosen the
plate, then you take out a screw with thread on two sides, one with
bigger and one with thinner thread.
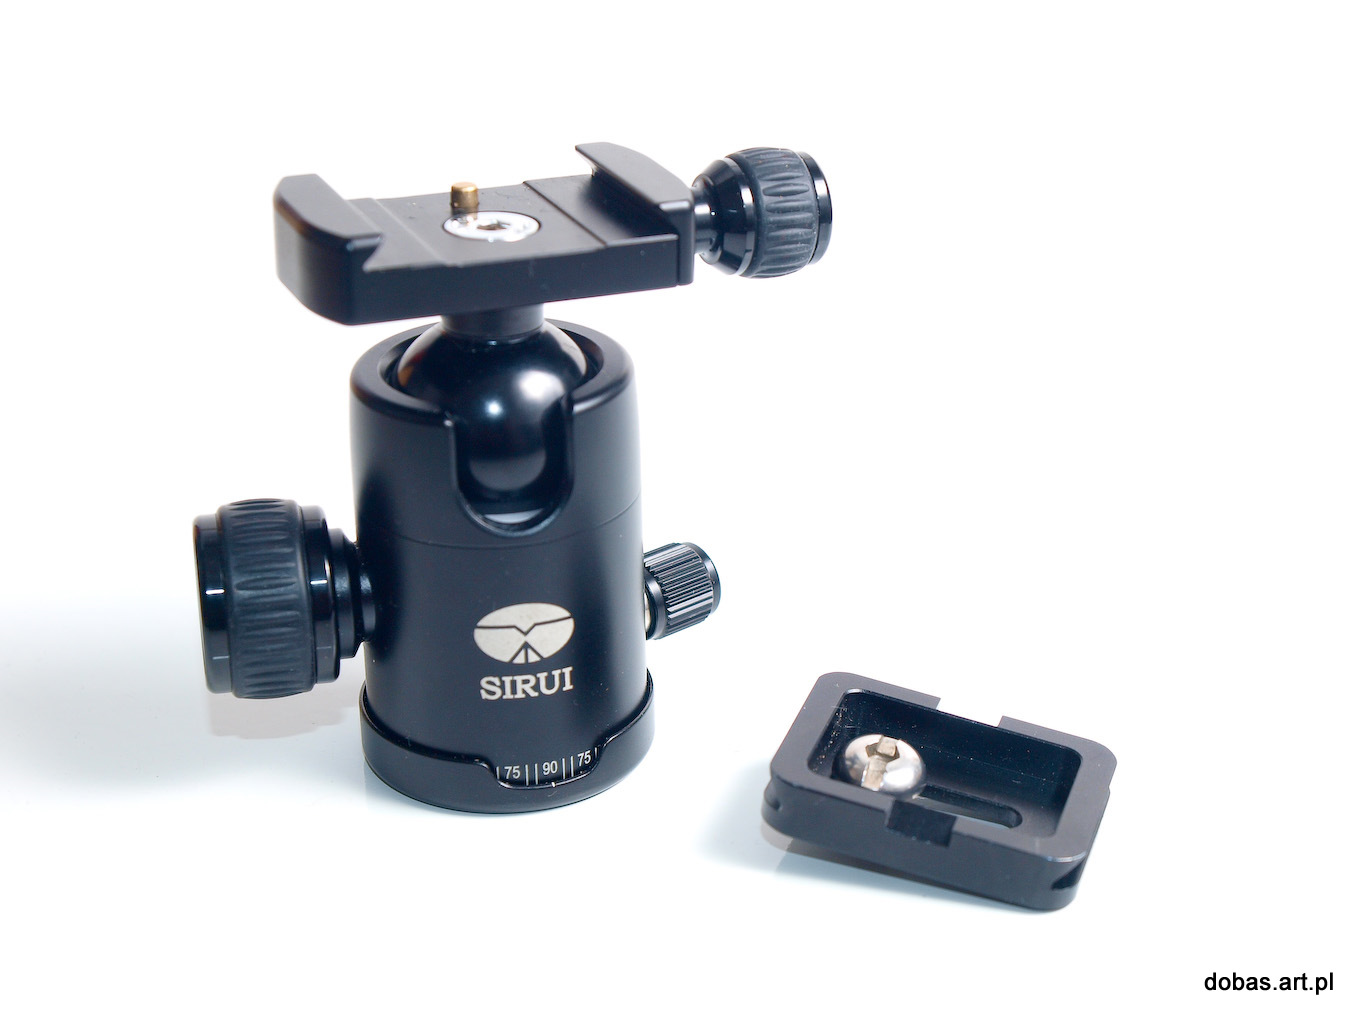
The C-10 head is also good
quality. When you hold it in your hands, you can feel it is reliable,
solid, and well thought through.
The first
thing worth mentioning is the fact that the head is equipped with two
independent knobs. It is a basic functionality, because when you want
to use the head to make panoramas, on the one hand you need to have
the camera blocked in a desirable position, and on the other you have
to be able to turn it around a vertical axis. Two independent knobs
make this possible. As can be seen on the photograph, the knobs on
the head also have a rubber layer. After a month of intense use, the
rubber is still in a perfect condition and still has good grip.
Apart from
the two knobs, the head has also an angular scale and additional knob
for fixing the quick release plate.
The quick
release plat is tiny just like the head. It is fixed to the head in
something that looks like a vice. Turning the screw widens or
tightens the vice, and enables connecting or disconnecting the quick
release plate. At first, there was one thing that bugged me – every
time when I wanted to fix the quick release plate to the head, I
would first turn the ‘vice’ for a while, but then I realised that
it made no sense! It is enough to loosen the vice a little, and you
can slide the camera into the vice. Another important feature is the
blocking system preventing accidental falling out of the camera from
the quick release plate. It is another proof that the whole thing is
well thought through and is focused on practicality for the user. The
only minus I noticed would be the way the quick release plate is
fixed to the camera – to do this you need a screwdriver, although a
coin will do. It is not a huge difficulty, as I always carry a coin
in my pockets, but Manfrotto’s solution is definitely better.
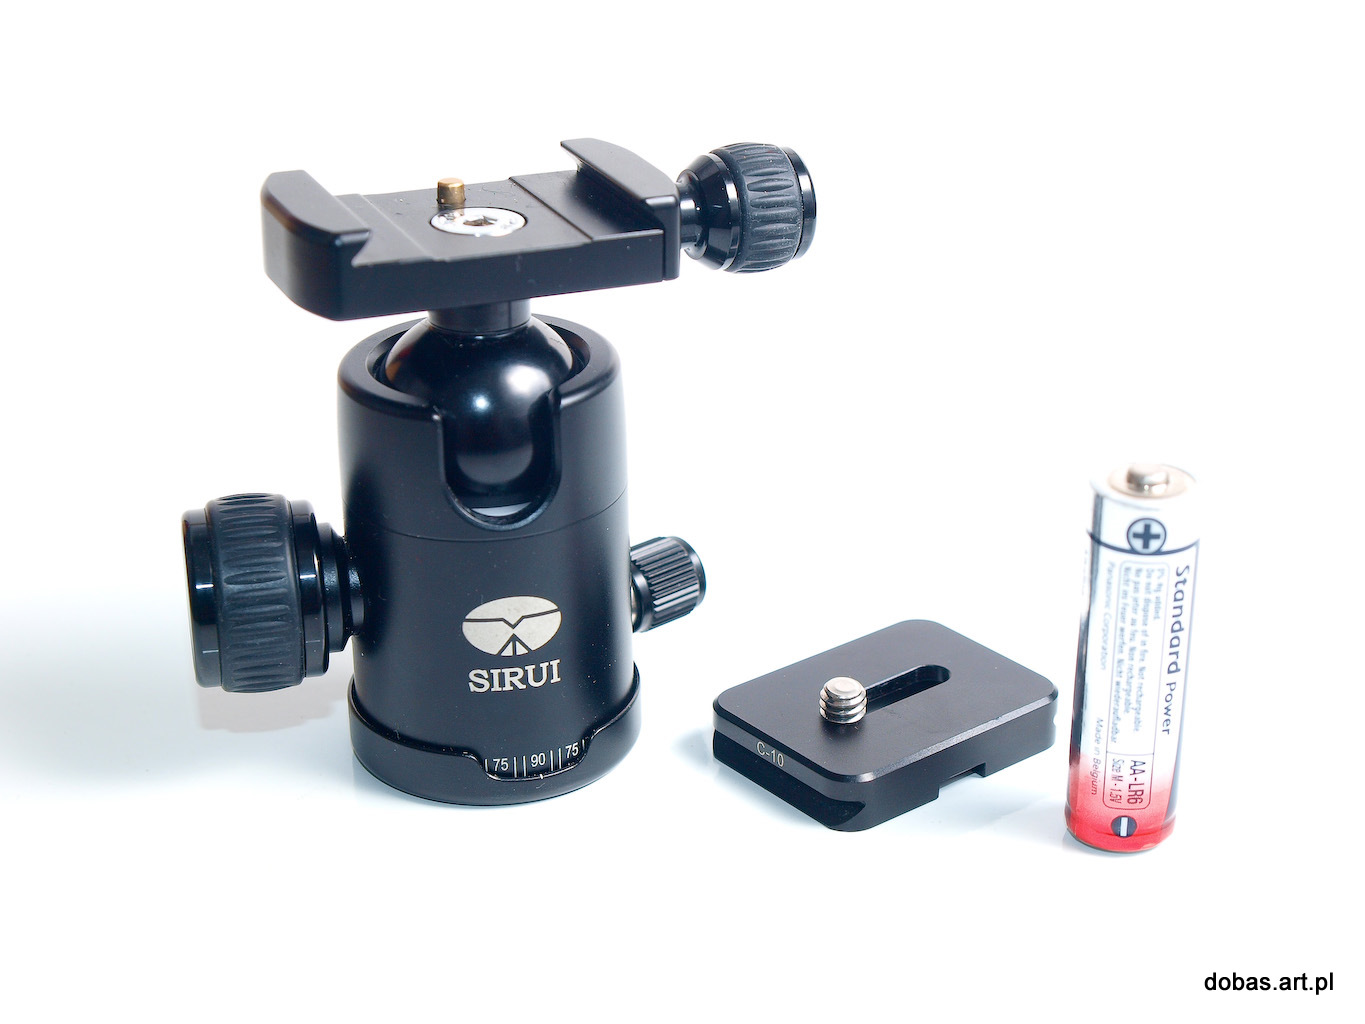
The whole system is really
tiny, to give you an idea – a photo next with an AA battery.
The times
when MADE IN CHINA was a synonym of shoddy are long gone. China is
the number one economy, and sends all over the world huge numbers of
high quality products at prices much lower than the price of brands
with established position in the market and well known among the
consumers. In terms of quality, however, the gap between those
products is insignificant. With my E system I use Manfrotto tripod, I
also had Gitzo, but faced with a choice, I would go for much cheaper
alternative, solidly made and offering exactly the same features. I
would use the money saved on a photography trip.
To sum
up, the tripod is an excellent solution for photographers who want
reliable lightweight equipment. It is excellent value for money, when
you compare analogous tripods manufactured by brands known in Europe
for years. For mirrorless interchangeable-lens
cameras, at the moment I would not use any other tripod.
It is a
little different in case of DSLRs - although PEN with ZD 50-200 works
well with this tripod, very heavy camera with large lens would be too
much for it. I used it to support a camera weighing around 1500 grams
(E3 + 14-54)
However,
you have to remember that with large body DSLR you would add to it a
long focal length lens. And although large DSLR with ‘standard’
lens will work well with this tripod, the same camera with a large
lens will not. In my opinion, this tripod is ideal for mirrorless
interchangeable-lens
cameras and small DSLRs, like E410, and not for giants like E3 or E5.
With all that said, I had hard time finding any flaws in this tripod.
Still reading? Join in more discussion on facebook
Subskrybuj:
Posty (Atom)